Egad my dear friends...seems like my last
few posts have been way too serious! I want my blog to be a place
where you can come to have fun, get inspired, be creative and leave
happier!
So, follow along with me and I will show you what my hubby and I have been up to.
Back
in October, we began the renovation of what we called 'The Carriage
Room'. When we moved here 4 years ago, this room was the one with the
wood stove, so we would all gather in there...problem was, with it's
funky loft and 'pit', the room could only fit one couch and one chair
and, as the family has grown, so has our need for a large gathering
room. This room was so unlike the rest of our home, which was decorated
in decor to fit the grand 1830 home it is. It was a bit difficult to
get the family to agree that the loft had to go (it was a great place to
set up a table for games and a cozy spot for a warm nap), but I had a
vision...and when I saw a gorgeous big window at our local discount
building supply last year...I started to get giddy with the excitement
of a MAJOR renovation.
It
always bothered me that this room had two tiny windows on the north
side...and we have an incredible view from that side of the house. The
loft, as you can see...was a hazard for the little grand kids...they
could easily fall through the railing...and the 'pit' below (and behind
the couch), with it's crumbling cement patches and rock fountain
walls... was cold, damp and of little use, and the cracks in the
concrete let those yucky spiders in too - ewwww.
This
project didn't seem too difficult when we started...but..... if you
have ever renovation an old house....you know that things are never as
simple as you think they will be.
Here are some of the before pictures
 |
| The baby gate was used to close off the 'pit' from the kids and we had no place to put toys |
 |
| Reno of the chimney area is in the planning stages..but it will get a major face lift as well. |
First
off was getting rid of the clutter and that UGLY stove, as well as
ripping up the dated and dirty carpeting and tile in front of the door.
You can see the piles of carpeting and our new stove next to the old one.
Next
up was replacing the small window on the loft...the panes of glass were
nearly falling out, and I had a special idea to replace it.
 |
| Pardon the construction debris. |
I
searched Craig's list for months until I found this pretty stained
glass window. Originally taken from an old Victorian home in the area,
it fit our spot nearly perfectly! Hubby and I framed it up, and placed
another glass panel on the outside, to keep the stained glass window
from the elements.
Next to go was the loft....
 |
| DIL Maria loved helping me to demo the loft. We were so excited to get it done. |
 |
| Don't worry...we saved ALL the old barnwood for other projects |
 |
| Looking into the 'pit' from the loft |
 |
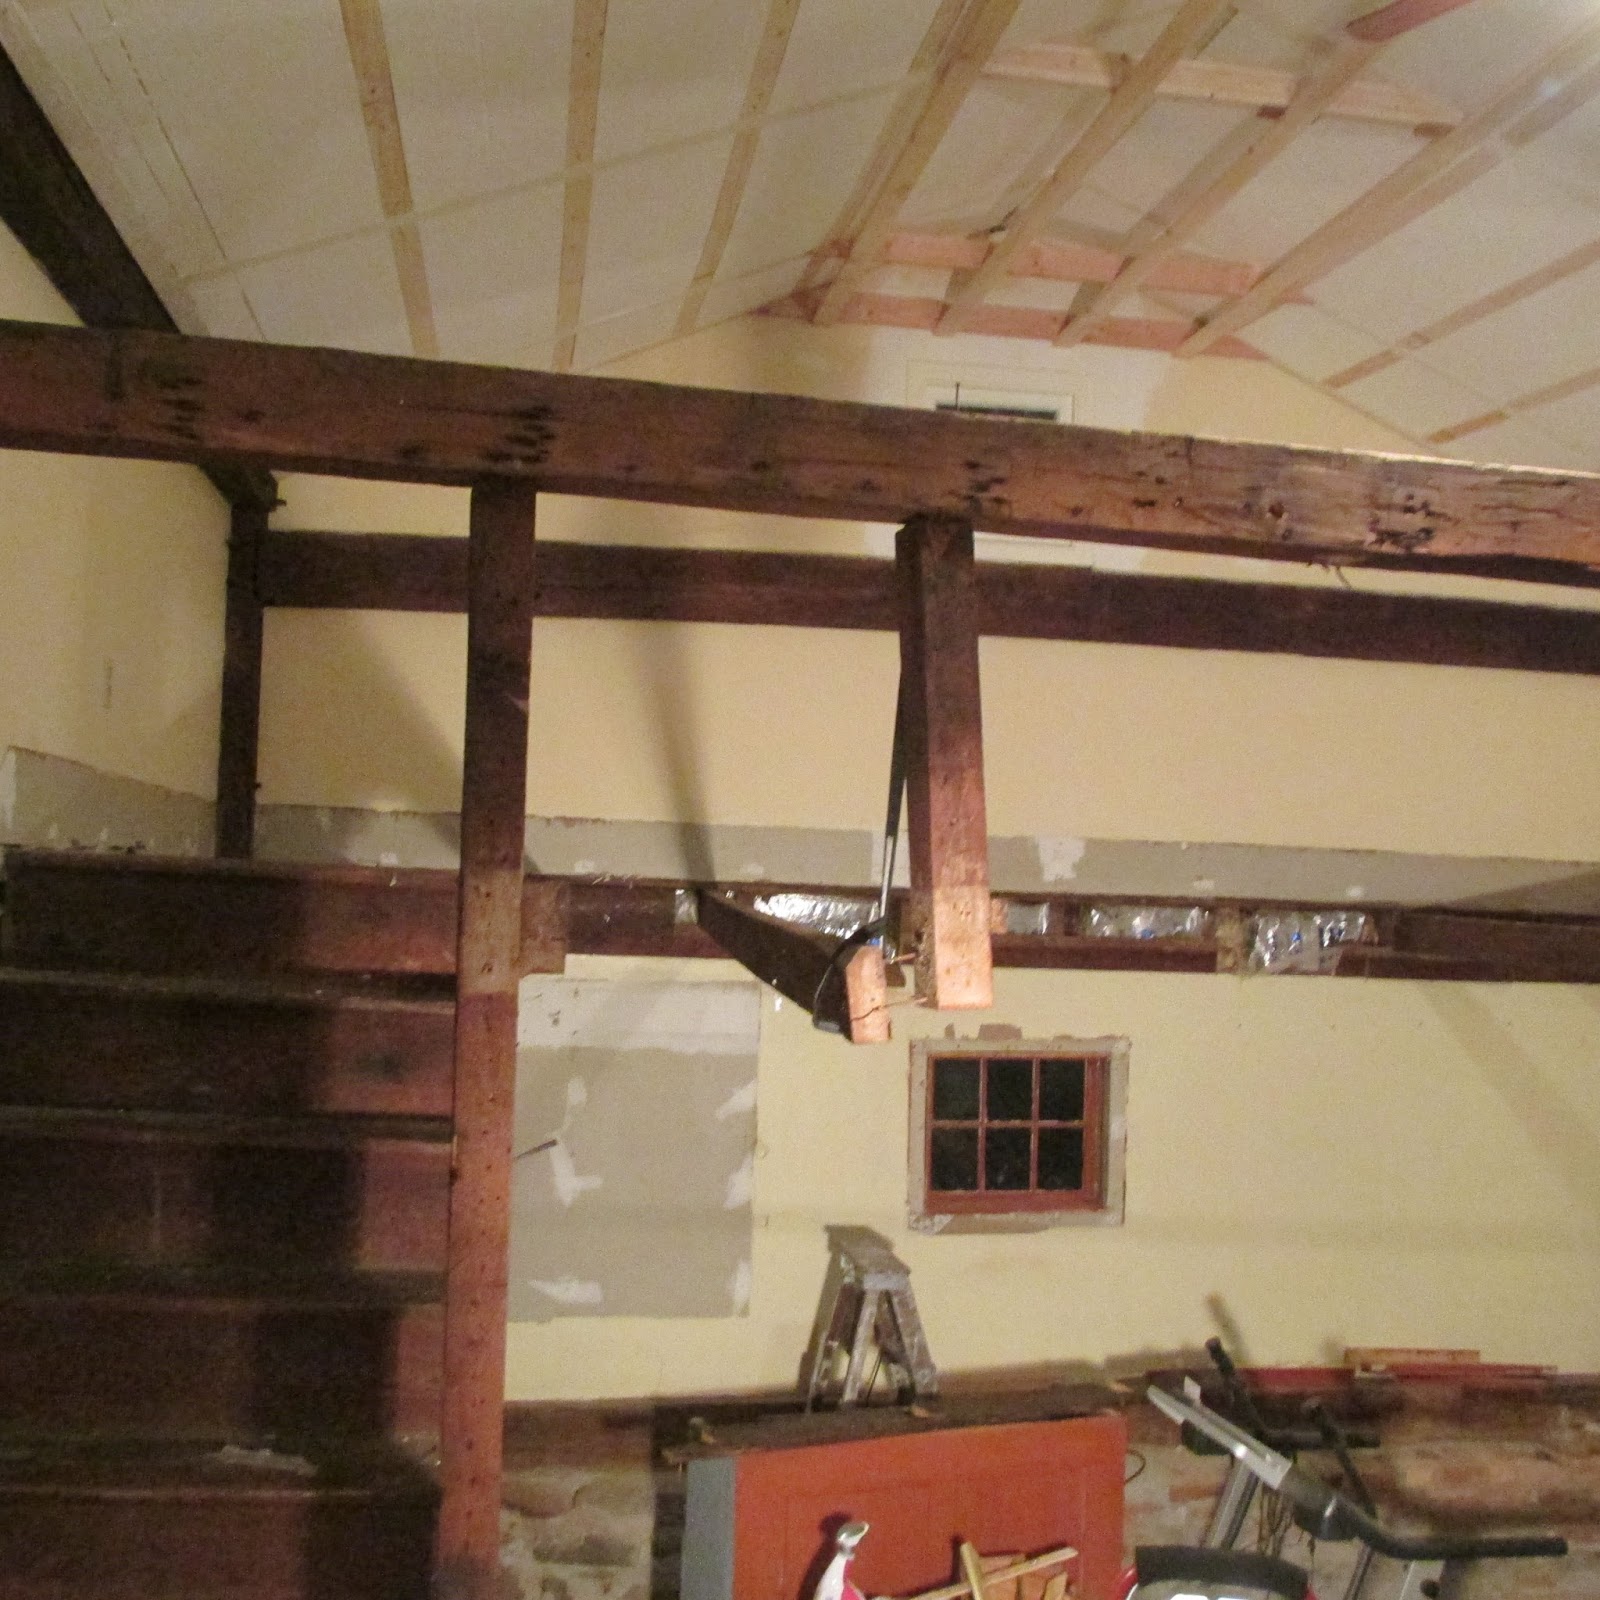
| Almost done, and you can see Hubby's framing for the new center drop in the ceiling, so we can install recessed lighting above. |
 |
| Hubby removing the steps up to the loft. I swear they must have used 1,000 nails! |
|
Now,
I had done a little 'investigating' prior to beginning the project. I
poked a hole in the drywall in the bottom,north corner of the pit
area...because, as I mentioned...it was so cold down there. Well...as I
peered into the hole, I could see LIGHT! I knew our next step was to
take the drywall off to see what was going on behind that wall.
 |
| Ripping off the drywall exposed little to no insulation and a host of other issues we needed to deal with. |
 |
| The old 'carriage' doors were simply nailed shut. We could see cracks all along this wall, which let in tons of cold air; |
 |
| They even left the old hardware on the door! |
 |
| I installed new insulation and used about 5 cans of "Great Stuff" to close off all the holes I could find. |
 |
| Construction
is never glamorous! Part Two of this section of the wall to come in
another post...there was more there than met the eye at the time this
picture was taken. Note that we left the steps down to the 'pit' in
place, while we were working down there. |
 |
| I will skip ahead a little bit....and come back in another post to the Part Two mentioned above. | Before we could install the new picture window, a floor over the old 'pit' had to be installed. |
 |
| More walls being ripped out and more new installation goes in. |
As
we pulled more and more of the old, yucky insulation out, hubby did
some rewiring and installed new joists for the additional flooring.
 |
| Nearly done with the new floor portion, and beginning to rip out the framing around the small window. |
 |
| As
I ripped out the framing around the window, huge gaps appeared. Our
work on this room has certainly showed the poor workmanship done
before..... |
 |
| Under the window..yes...that is our patio you can see....seriously!!! |
 |
| The old window with framing gone....from outside on the patio. |
|
Stay with me everyone!
Come
back tomorrow and we'll show you the new picture window installation,
and other progress we have made, as well as Part Two, of the wall of
worries story mentioned above.


Wow! Lots of work. Can't wait to see how it all comes together:)
ReplyDeleteI am getting deja vu with our last reno...but it is all worth it in the end. Cannot wait to see your finish. Janice
ReplyDeleteI love that space, I think it would have become mine if I had a room like that, lol. I would be tempted to take the carriage doors out and repurpose them, they are beautiful. Can't wait to see how it all comes out.
ReplyDeleteDebbie
That is quite the reno you're undertaking. I love seeing all the in-progress photos and can't wait to see the finished product. I'm on my second old home and I can completely relate to the surprises you can find behind those walls. I just love the old carriage doors in your photos.
ReplyDeleteI love what you've done, it looks fabulous!
ReplyDeleteHope to see part 2, what are you op to with the old doors?
They'd make a wonderful display of some kind!
You're going to have such a beautiful space when you're done. Great pics!
ReplyDeleteWow....it is just like watching HGTV! I love it!
ReplyDeleteBe blessed,
Cindi
Whew what a project ! I do adore all the olde wood in your home and am thrilled to hear that you kept the boards for future projects ~ thrilled to follow along ~Angie
ReplyDeleteThat is a lot of work! Looks like you guys are doing a great job, so neat that you can do it yourselves. Your new stove is nice!
ReplyDelete