
Welcome to my blog and my Second Annual
Twelve Days of Christmas Celebration!
I'm so happy you are here, and I hope that you will return each day to learn a few new craft tutorials and recipes to give your home a warm and cozy feeling this Christmas. We all know how tight money is these days, so I will try to feature low cost decorating ideas and yummy recipes!
So, without further delay...
Day One
Easy Snowflake Ornies
Supply list
Glue Gun
Glue Sticks
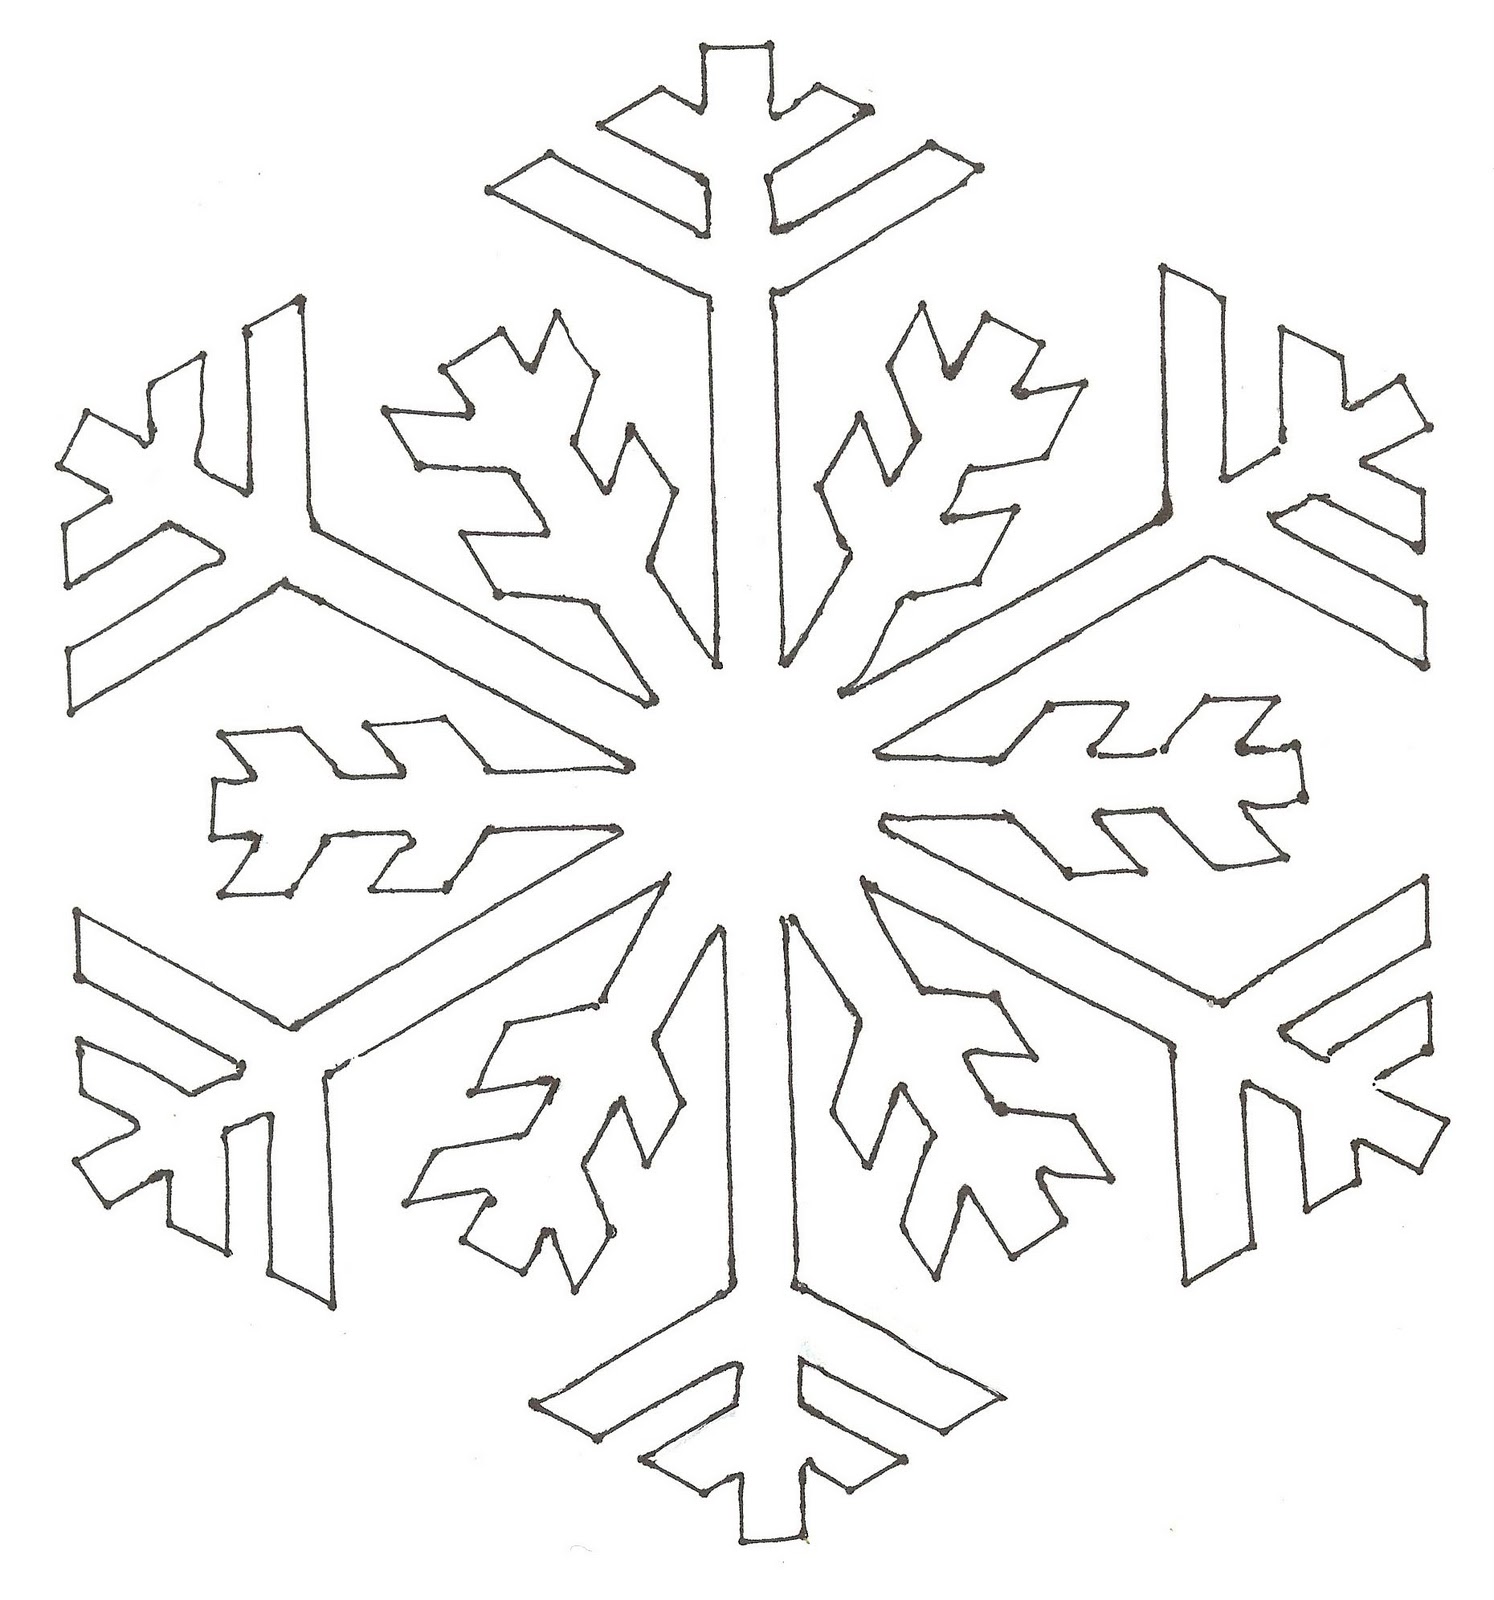
Snowflake Templates
Modpodge or White Glue
small craft paintbrush
Glitter in your choice of colors
Parchment paper or silicone hot glue gun pad
(you could also use a piece of glass, such as a picture frame glass inset.
It needs to be see-through and heat resistance, and you must be able to peel the glue off of it.)
Aluminum foil
string, twine, ribbon or fish line for hanger

You can search the internet for your own snowflake templates, or use the ones below. Print out the templates you wish to use, adjusting the size (I used a printing size of 4 x 6, which worked well) with your print program. Please feel free to right-click the templates below and save to your computer for printing.


Now you are ready to begin.
Place your snowflake template under your silicone pad, parchment or glass. Heat your glue gun and when it is ready, carefully squeeze the glue onto the pad, following the outlines of the template carefully. Place a thick line of glue...don't make it too thin.

Once you have covered all of the template lines, wait for the glue to cool, and then peel it from your pad (paper or glass)

Check your glue snowflake for any thin areas and add a bit more glue to any spots that need it. Pull off any extra little strings of glue that may be hanging from your snowflake, and place it on the foil.
 |
| Drew with his snowflake...ready to add the glue and glitter |
Apply a generous coat of Modpodge or glue to the top of the snowflake, but don't let it drip down around the edges too much. Try to be as neat as possible, but still cover the surface completely.

Immediately shake your glitter onto the Modpodged snowflake. Cover generously and allow the snowflake to sit, undisturbed, for a few minutes, to allow the glue to set.

Carefully grab the very edge of your snowflake and remove it to a clean piece of foil, and allow to dry completely. If after drying you wish to re-coat the snowflake to fill in any sparse areas, repeat the glue and glitter process and let dry again completely.
Once your snowflake is totally dry, flip it over and attach a loop of string, twine, ribbon or fish line (your choice) to the back as a hanger, with a dab of hot glue.
Here's a look at a few different ones that we made. Drew and Maria
helped with this project and made a few of their own to take home. I
found it difficult to get a good picture once I placed them on the tree
(probably because it was dark out), so I am just showing them once they
have dried.


Now you are ready to hang your ornament!
These were a lot of fun to make, and my pictures don't do them justice. We loved trying different colored glitter. I'll be making more soon, to complete the tree we got for the dining room.
Hope you enjoyed this first tutorial and will be back tomorrow for another
Twelve Days of Christmas
Post!
See you then!
Oh, and just a reminder that I have added a page with all my tutorials and recipes from last's year celebration. See the tab at the top of my blog.


Beautiful! Thank you, Wendy :)
ReplyDeleteOh how fun!
ReplyDeleteGreat job Drew. :)
Thanks for sharing.
Woolie Hugs Chickie Pal
Trace
www.grannytracescrapsandsquares.com
Morning Wendy,
ReplyDeleteWhat a fun project.
Thanks for sharing.
Hugs,
Tam
Thanks for sharing your pretty snowflakes Wendy.....YEY!!!! Blessings Francine.
ReplyDeleteWhat a fun idea Wendy! I think i have some hot glue that has glitter "built into it" that I could even use!
ReplyDeleteThanks!
Kendra
Wow! These are so pretty! They're on my to-do list now - thanks so much for sharing!
ReplyDeleteBTW - some of the photos from last year's tutorials aren't working now - not sure if there's anything you can do about it?
ReplyDeleteLove these, thanks for sharing, want to try these. hugs, Lecia
ReplyDeleteHi Wendy,
ReplyDeleteNow that is cleaver...who would have thunk?
Just to cute.
And since I am behind love your Peanut Brittle recipe.
My grand use to make it all the time. Reminds me of her.
Enjoy you day,
Barb
Wendy,
ReplyDeleteI love this! I could do it with my fifth graders! I am going to do it for me too! I wonder, do you think the kids could do the same thing with some thick white glue? If not, I will get parent helpers to do the gluing, and the kids can sprinkle. I don't trust some of my students with a glue gun...
Blessings, Friend!!!!!
Heather
Love your Snowflake ornies.
ReplyDeleteThis would be a project I could do with my youngest son!
Thanks for sharing.
sandraallen260@centurytel.net
Love the blue snowflake!! Great tutorial!!
ReplyDelete